 This tutorial is part of a series of project tutorials I will be creating for beginners looking to get familiar with node-red by creating actual flows.
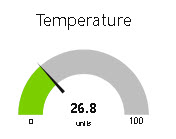
In this simple project we will look at splitting a simple message payload, and then display the data in a text box and on gauges on a dashboard.
The payload consists of a simple string containing temperature and humidity readings separated by a ampersand (&).
{“topic”:”node1/temperatureandmoisture”,”payload”:”26.81&1024″,”qos”:0,”retain”:false,”_msgid”:”2b22bffa.9eff4″}
To split it we use the split method to split the string into an array.
The array will look like this [26.8,1024].
Next there are two main approaches to dealing with the data:
- Place data in an Object
- Assign data directly to message properties
Placing data in an Object
We place the data into a JavaScript object and assign to the payload before returning. The code is shown below.
var data=msg.payload;
var temp=data.split("&");
var out={};
out["temperature"]=temp[0];
out["humidity"]=temp[1];
msg.payload=out;
return msg;
The output would look like this.
{temperature:26.8,humidity:1024}
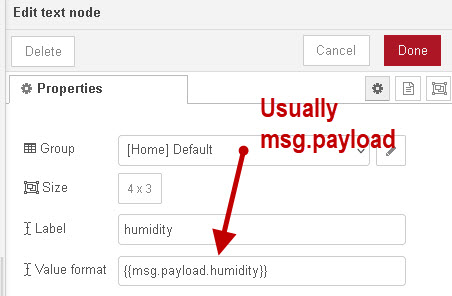
To display in a text box we change the value format form msg.payload to msg.payload.humidity as shown below.
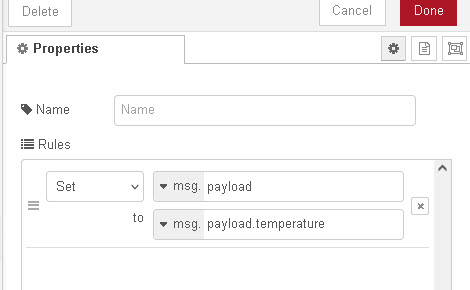
To display on a gauge we need to insert change nodes to change as shown below:
Assign data directly to message properties
The second approach is simpler and we use a message property for humidity and temperature and now our code looks like this :
var data=msg.payload;
var temp=data.split("&");
msg.temperature=temp[0];
msg.humidity=temp[1];
return msg;
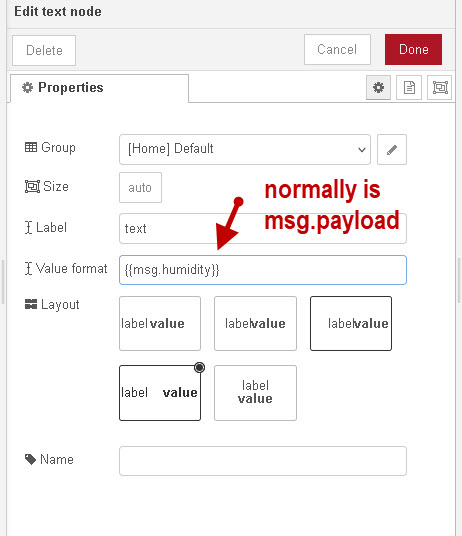
To display it in a text box set the value format to msg.humidity instead of msg.payload.
However if you want to display it on a gauge then the value must be in the msg.payload field.
To do this we can use change nodes set as follows:
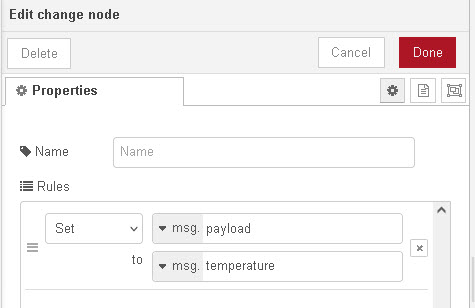
Both Approaches use the same nodes but they are configured differently. The flow look like this:
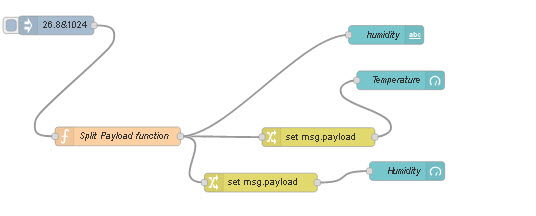
The dashboard like this:

The flows for both approaches are available to download below:
Related Tutorials and Resources
- Understanding and Using The Node-Red Message Object
- Filtering MQTT Topics (commands and Responses) in Node-Red
- Republishing HTTP Data Over MQTT with Node-Red
- MQTT Data Logger -Node-Red


Just starting this epic journey. Seems intriguing.
thank you very much for this tutorial. some of the documentation is hardly teaching this even in some online forum.
Thanks again and more power