
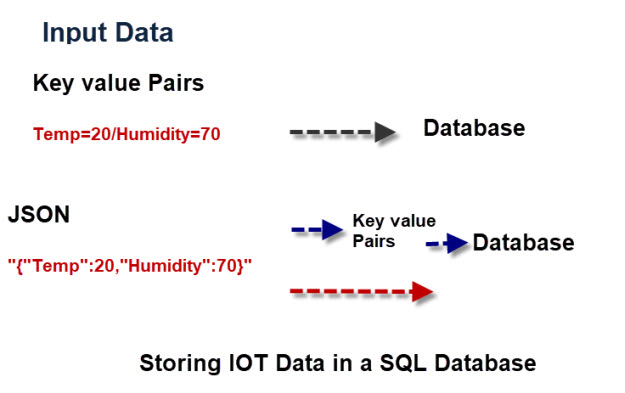
![]() IOT data from sensors and other devices usually comes as either a text string usually with key value pairs or more commonly as JSON encoded data.
IOT data from sensors and other devices usually comes as either a text string usually with key value pairs or more commonly as JSON encoded data.
Databases accept a variety of data formats the most common are INT and TEXT.
Incoming text data can be stored directly in the database.
JSON encoded data is also a text string and so can also be stored directly in the database, but more commonly you will want to extract parts of the data to use as database keys (column names).
What is SQLite?
SQLite (SQL +lite) is a lightweight serverless database that does not require any configuration.
It uses the same SQL syntax as other RDBM databases e.g.MySQL and is contained in a single .db file that can be easily copied.
It is used in many applications but for IOT/home automation it is used for storing sensor and configuration data.
SQLite Basics
SQLite stores all data in a single database file (.db). This file is organized into
- Tables – store data in rows/columns
- Indexes – speed up lookups
- Schemas – structure definitions
Tables are the main storage unit and they consist of a set of records or rows and each row consists of a number of columns.
This is very similar to an excel spreadsheet.
Data Types
Before you can store data you will need to decide on a table name and then the structure of each row (the schema).
SQLite uses dynamic typing and has the following data types.
- INTEGER → whole numbers
- REAL → decimal numbers
- TEXT → strings, dates, JSON, etc.
- BLOB → binary (images, files)
- NULL → empty value
Each element in a row has a name and a data type:
Below is an example of a command to create a table.
The table stores a timestamp, sensor name and sensor value.
Each row is given a unique id.
CREATE TABLE sensors (
id INTEGER PRIMARY KEY AUTOINCREMENT,
sensor TEXT,
value REAL,
timestamp TEXT
);
Working with SQLite from the command Line
Although we will be creating node-red flows to create and tables, store and retrieve data it is very useful to be able to use the command line. (covered later)
SQLite Node-RED Example
The easiest way to see this is by doing an example. Let’s assume our incoming data payload looked like this:
{timestamp:0,sensor:”sensor1″,”temperature”:20,”humidity”:71}
So what we have is a device called sensor1 and two key/value pairs:
temperature=20 and humidity=71
To store this data in a data base we first need a database and a table.
So lets create a database called test.db and a table called data.
Now a table consists of rows and columns. To create a row we need to add elements to the columns. To do that we need to assign names to the columns.
In our example we would need three columns called:
- timestamp
- sensor
- temperature
- humidity
We also need to assign a data type to the values, in our case sensor would be TEXT and temperature and humidity would be Integers (INT)
When we add our data to the table the table would look like this:
| timestamp | Sensor | Temperature | Humidity |
| 0 | sensor1 | 20 | 71 |
Note: Column names are not case sensitive.
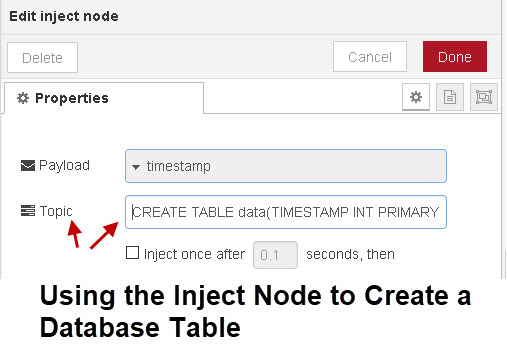
To create the table use:
CREATE TABLE data(TIMESTAMP INT NOT NULL,SENSOR TEXT NOT NULL,TEMPERATURE REAL NOT NULL,HUMIDITY REAL NOT NULL)
Adding Data To a Table
To add data to a table we need to use SQL commands. The command to do this has the form:
Insert Into Tablename (columns)(values)
where columns are out column names and values are the values we are assigning to these columns.
In our simple example we have:
Insert Into data(timestamp,Sensor,Temperature,Humidity)(0,"sensor1",20,71);
In our node-red flow we will usually need to construct this command in JavaScript using a function node.
The process is:
- Extract data elements from incoming data
- Create SQL command
- Pass SQL command to the database connector
The following code snippet shows how we do this:
var data={"sensor":"sensor1","temperature":21,"humidity":61};
//extract elements from data
var sensor=data[0];
var temperature=data[3];
var humidity=data[5];
var timestamp=0;
//currently use simple counter as a timestamp
//create SQL command
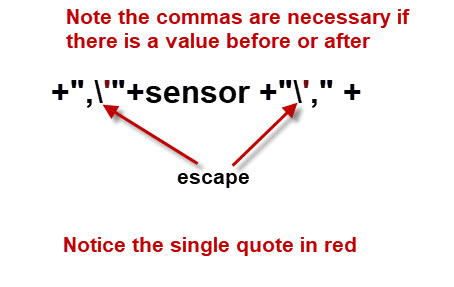
msg="(timestamp,sensor,temperature,humidity) values("+timestamp+",\'"+sensor +"\'," + temperature + "," + humidity +")";
var topic="INSERT INTO DATA " +msg;
var msg1={}; //create new msg object
//The SQlite node expects the command in the topic field
msg1.topic=topic;
return msg1;
The interesting and most important point when constructing the command is that text values need to be in quotes, and because we are constructing a string we need to escape them. So we have:
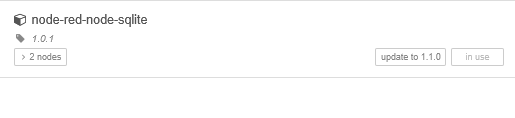
SQLite Database Node
There are node-red nodes available for a variety of databases for SQLite use the node-red-node-sqlite node.
SQLite is a simple lightweight database and ideal for using on devices like the Raspberry PI.
In contrast to other SQL databases it isn’t run as a service and so is much easier to setup and use.
Because SQLite is a SQL database the code shown here and used in the videos should work with any SQL database.
Note: When installing the SQLite node on raspberry Pi it appears to have installed but hasn’t.
This is because it usually needs to do a compile which takes time so you need to start the install and wait 5-10 minutes for it to install.
If you look at the console you should see the confirmation when the node has finished installing.
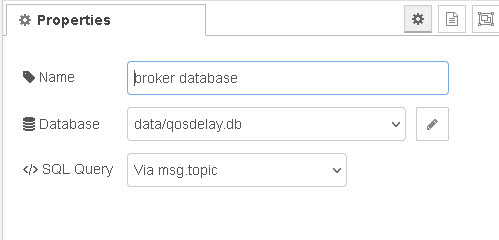
There are two things that we need to configure in the SQLite node
- The database name:
- The SQL Query
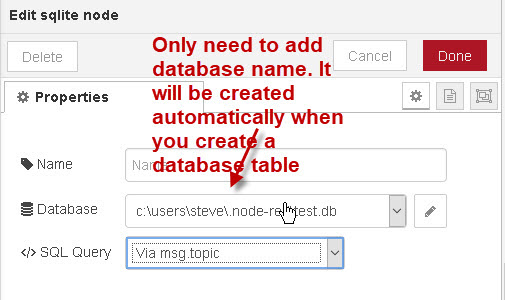
SQL Query
You have several choices here the default is via msg topic
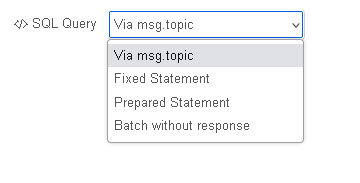
In most of my earlier flows I used the msg.topic but have since moved to prepared statement as it is supposed to be more secure, but I also found it much easier to use.
All of the videos on this page use the msg.topic
Using a prepared statement is covered later.
Note: It isn’t necessary to create a database in advance as if you create a table using the node then it automatically creates a database if it doesn’t already exist.
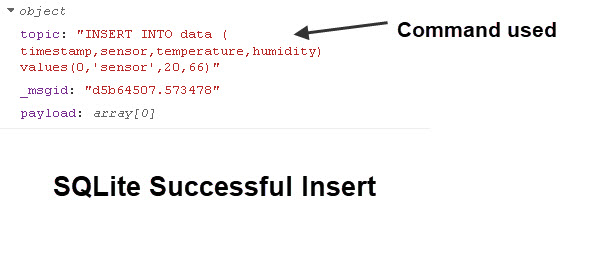
SQLite Node Input
The database command is passed into the node using the topic property, the msg.payload isn’t important.
The node will output an empty array in the payload on success.
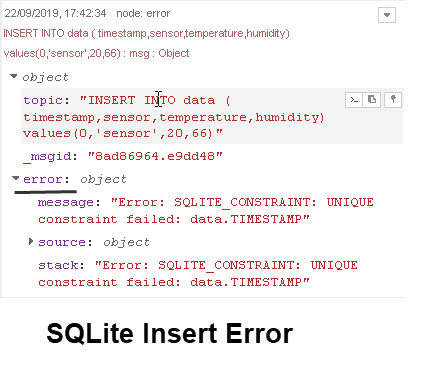
 However if it is unsuccessful there is no output from the SQlite node.
The error message shown below is captured using a catch node elsewhere on the flow.
SQL Commands Notes:
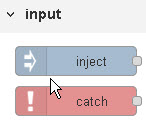
Function nodes are necessary for inserting data as the data is dynamic and the command has to be built with each insert.
However creating and dropping tables and other tasks can be done using inject nodes with the command hard coded.
Splitting our incoming JSON data stream has the advantage that we only need to store the data that we want.
However a big problem with it is that is we decide we want to add another field then adjusting the table schema isn’t easy.
This is were storing data a a JSON string comes in very useful.
Video-Node-Red Storing IOT data In a SQL Database
Using a Prepared Statement
The previous examples used the msg.topic to pass the commands, but I have now moved to using another method called the prepared statement.
Passing database command in the topic risks a SQL injection as the payload isn’t sanitised unless you do it yourself.
When using a prepared statement to data is passed in the msg.params object and the command is created in the node itself.
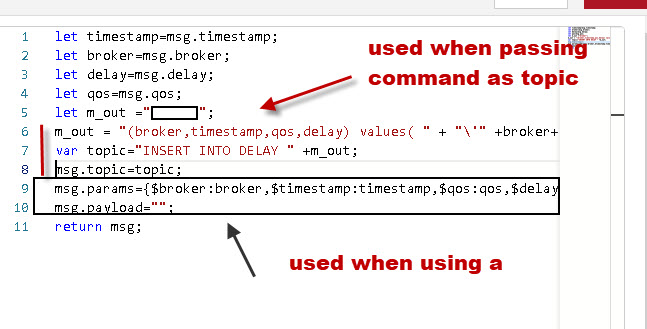
The easiest way of seeing this is by showing you the two methods side by side.
The screen shot below shows the function node that prepares the data for storing data with the code for both methods shown.
The database node looks like this when using the topic for the database query:
And when using the prepared statement it looks like this.
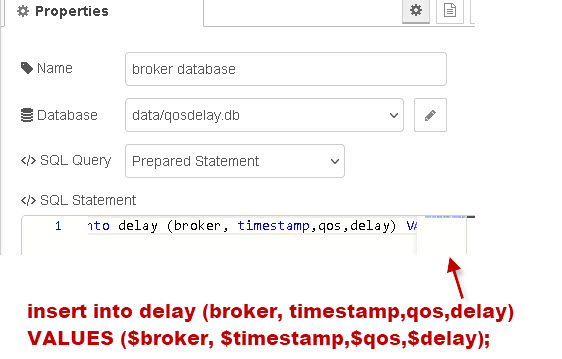
Note: Because it wasn’t possible to show the complete query in the screen shot I put onto the image as red text.
You should note that we have just covered a database insert but we could have done a query or update using the prepared statement.
The disadvantage of the prepared statement is that we need a SQlite node for each type of database query.
The advantage is that it is more secure and avoids the headaches of data preparation in the query which can be very difficult with lots of parameters.
JSON Data
It is possible to store JSON data directly in a SQLite database- see Storing and Retrieving JSON Data In SQLite
Resources :
Note: flows relate to three videos on SQLite. The first video is included in this tutorial the other two videos and flows have been superseded but I have left them as they are still useful.
flow-video1,2 and 3

Note: if you have any problem importing the flows please let me know.
Common Questions and Answers
Q- Can I store time series data in SQLite?
A- Yes. Video 3 illustrates reading data from a SQlite database by time.
Q- Should I use Influxdb for my Time series data and not SQLite?
A- It all depends on your application and expertise. Influxdb is far more complex than SQLite and requires more resources.
Q- Can I graph Data from a SQLite database?
A- Yes you just pass the result of the query to a graph node.
I have recently completed a workbook on how to store IOT data in a SQLite database using node-RED.
The workbook is free and I would appreciate your comments/feedback
Download here
Related Tutorials:
Hi Steve,
Thank you for this interesting mini-course. However, I find it very difficult to replace the dummy data by actual data from my (MQTT) temperature/humidity sensors. Could you please provide some additional information on how to do that?
Can you contact me from the ask-steve page http://www.steves-internet-guide.com/ask-steve/
after that you can send me your current flow and I’ll take a quick look.
Rgds
Steve
Hi Steve,
please use prepared statements for sql and don’t combine values and command in sone string.
Even though it is unlikely in this case, your way for SQL command building is insecure and even for simple cases prepared statements should be used.
In the other case, users will use your approach for security critical things.